Moving Windows “My Documents” to OneDrive
With the drive to the cloud Microsoft has done away with their Migration wizard that you used to be able to use when you got a new PC. So the question becomes “Well how do I move my documents and settings?” and the answer is pretty easy, OneDrive. With OneDrive you have access to all of your documents from the cloud wherever you are. This article will walk you through how to move your My Documents folder to OneDrive.
Step One. Create a folder for “My Documents” in OneDrive
The first step will be pretty obvious, assuming you have OneDrive installed (which if you don’t go install it right now). You’ll access your OneDrive folder:

and Right Click on “OneDrive” to create a new folder. What would you name the folder? Well “My Documents” comes to mind first but maybe you have multiple PC’s you want to access the folder from so perhaps “Office My Documents” for the office PC and “Laptop My Documents” for your laptop, etc.
Step Two. Update “My Documents” on your Windows PC
On your windows PC open up file manager and go to the folder: C:Users then double click on the user you’re looking to modify to bring up the folders for that user:

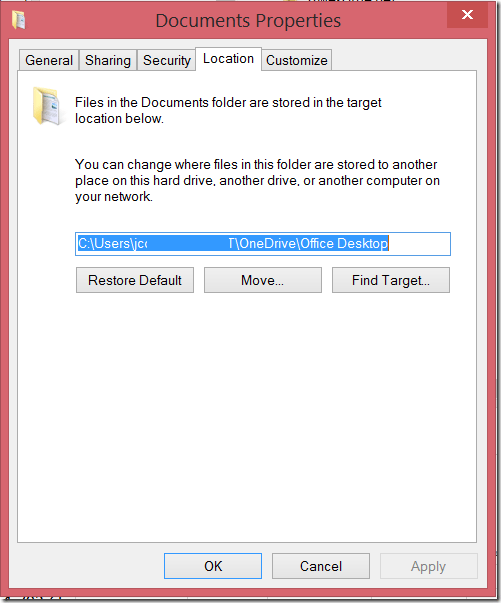
Now you’ll see the folder “Documents” Right click on that folder and click on Properties then click on the location tab and update the location tab to the location of the folder you just created in OneDrive.

The system will ask you if you want it to copy all files to that folder and you should say yes. That’s it. All of your documents will be copied over and now when you click on Documents or save a file in your Documents Library it will automatically save it in the folder that will be synced to OneDrive.